Begin experimenting with SWiSHmax by creating a simple animation:
- Run SWiSHmax and start a new movie by selecting File > New.
- Use the Movie panel to set the desired height and width for your movie. In this example, the movie is 300 pixels by 300 pixels. This box is 300 pixels wide by 300 pixels high:

- Set the frame rate to 15 frames per second.
- Select the ellipse tool (
 ) from the Tools and click and drag on the stage to draw a circle where you want it to appear. Hold down the Shift button while you click and drag to create a perfect circle.
 - Notice that when you added your circle to the stage, a new layer was added to the timeline, and that your shape is also visible in the Outline panel.

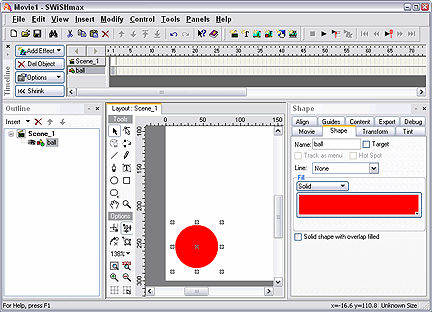
- Click the Shape tab in the Object panel and give your object a name by typing it in the Name field. In this example, the Object is named “ball.” Notice that when you name the object, that name is reflected in the Timeline and Outline panels. You can also change the color of your object in the Shape panel.
- Next turn your attention to the Timeline panel. Click the Add Effect button
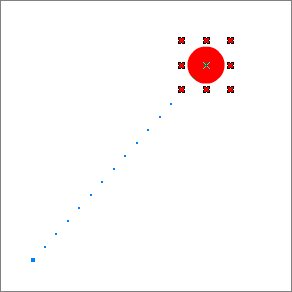
 , and select Move from the menu that opens. SWiSHmax places a Move effect over 10 of the shape’s frames
  .
. - Click and move the object in the stage to another position. Notice that as you do so, a dotted line follows the shape from its original position. This is the path the animation will follow in the frames between 1 and 10.
- Click the play button (
 ) in the icon menu across the top of the application to watch your animation.