- Start a new project and save it (File > New Project… and File > Save). If you want, at this stage you can also specify where your video captures will be saved, if necessary, by going to Edit > Preferences > Scratch Disks. If you don’t specify a location for Premiere to save the video you digitize, it will be saved in the same location that you save your project file.
- Connect the camera via FireWire and turn the camera on.
Digitizing? Capturing?
Did you miss our description of what digitizing is? See How to Shoot Video for the Web.
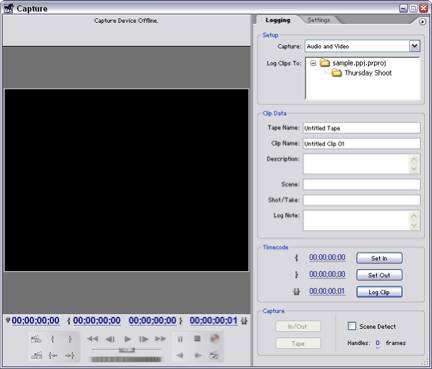
- Go to File > Capture to open the Capture window.
- Video can be captured by using the device control buttons (Play, Fast-Forward, etc.) in the Capturewindow to control your camera, or by using the buttons on your camera itself to advance and rewind the video. Either way, find the point from which you’d like to start capturing video by watching the Previewwindow to identify the points visually. It’s useful to know what clips you want before you start capturing or even to have written down the time code for the clips. It’s usually a good idea to start the capture a few seconds before the point at which you want to use the video, as there are sometimes a few frames of distorted video at the beginning of a capture. To capture, just hit the red Record button at the bottom of the capture window. You can name the clip you are capturing in the Clip Data section of the window (on the right), or let Premiere name the clip for you automatically.
- Don’t do anything else while capture is running. Nothing! No browsing and no checking your e-mail. Be strong.
- Hit the Escape button to stop the capture. Your clip is automatically inserted into the Project window.
- Repeat the capture process (Steps 4-6) until you’ve got everything you need digitized.