J-LearningYour how-to site for community journalism
Your how-to site for community journalism
Creating Web-formatted Images
If your image is at 72 dpi and you’ve made all your edits (color correction, cropping, resizing), you’re ready to save it as a JPEG or GIF.
Go to File > Save For Web. A window will open that lets you preview different GIF and JPEG settings before you save.
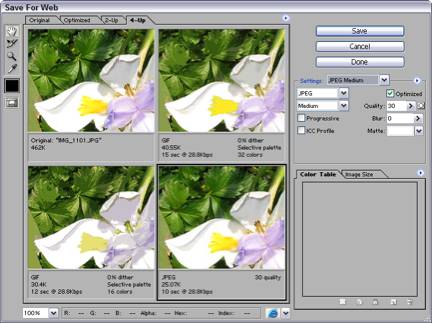
You can select either the 2-Up or 4-Up tabs. The 4-Up tab gives you four previews, as shown below. In the upper left, you have the original image.
Select any of the other three previews and choose one of the pre-defined web settings from the Settingsdrop-down menu to apply it to the preview.
Try applying different settings to each preview. Notice that each preview also shows you the approximate download time for the image at a set modem speed. Experiment with settings for each preview to find the one that gives you a good-looking image and a small file size. You can also alter the compression settings of any pre-set compression by changing the options shown in the Settings box. This will affect the quality of the image.
Once you’ve found a setting you like, click on it. A black box surrounds the preview. Click the Save button.
Navigate to the location on your computer where you want to save the image, give it a name and hit Save.
The image is saved as a copy. Your original image in Photoshop has not been changed to a GIF or a JPEG.