If you want to bring in music or a voiceover, you have some choices. You can import music from a CD or from a digital file on your computer. You can record a voiceover using audio editing software, or you can simply record your voiceover onto the video camera and capture it in the same way you capture video clips. (If you do this, set the Capture window to only record Audio by choosing Record Audio from the Setup Capture field.)
Of course, legally you should have the right to reuse any music you put in your video clip – the penalties for violating someone’s copyright can be severe, and as a content publisher, you don’t want to risk bad karma, either. There are plenty of options to find royalty-free music to use, as well. The most popular is GarageBand which comes with Apple’s iLife suite and has dozens of tracks and loops that you can use in your video. There are also extra packages you can purchase, called JamPacks, with dozens more royalty-free songs, tracks and loops.
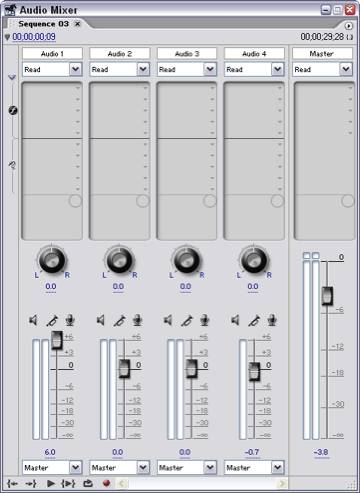
You can also record a voiceover via a microphone by opening the Audio Mixer window and using theRecord Enable tools.
Once you have the audio in your Project window, you can drag it to the location on the Timelinewhere you want it to play. From there, you can use some of the audio editing effects to control the way the audio sounds.
For example, if you want to overlay narration on background audio, you’ll want to lower the volume of the background audio so that the voice can be easily heard. To work with the audio levels of a clip:
- Select the clip in the Timeline.
- Open the Effect Controls view of the Monitor window.
- Expand the Volume effect, and then the Level effect.
- Move the slider up or down to increase or decrease the volume of the clip.
Often, the best way to adjust audio levels is in the Audio Mixer while the Timeline is playing. To do this, lay down all your audio and then play it back through the Audio Mixer, adjusting each track individually. (This takes some practice.)
To make changes during that playback, make sure that you can see each audio track for which there is audio in the Timeline. Use the playback controls at the bottom of the window to begin playing the audio. Use the Volume sliders below each track to adjust them independently of other tracks. (Sometimes it’s useful to repeat this several times, making adjustments to only one track at a time.) Premiere records the adjustments and applies them to the Timeline. Your volume adjustments will be audible the next time you play the Timeline.